
Grass Fed Ground Beef Smash Burgers
01 Short Answer: How to Cook Grass Fed Ground Beef Well
Grass fed ground beef is leaner than conventional grain-fed beef, which changes how it behaves in the pan. Less fat means faster moisture loss at high heat — so the method matters more than it does with regular ground beef. The key is working quickly at high temperature and not overcooking.
For smash burgers specifically, grass fed ground beef is actually an excellent choice. The smash technique maximizes crust formation in a short window, which means the burger develops deep flavor before the leaner meat has time to dry out. It is one of the few high-heat methods that plays to the strengths of this cut rather than exposing its limitations.
This guide covers what makes grass fed ground beef different, how to cook it well, and a practical smash burger recipe that gets the most out of it. For more on cooking beef with the right method, see our guide on how long to cook steak on the grill for a comparison of high-heat timing across different beef cuts.
02 What Is Grass Fed Ground Beef?
Grass fed ground beef comes from cattle raised on pasture grass throughout their lives rather than being transitioned to grain in the final months before slaughter. The distinction matters because what the animal eats directly affects the fat composition, flavor, and texture of the meat.
The label “grass-fed” alone does not guarantee the animal ate only grass. Some producers use grain finishing toward the end. Grass fed grass finished beef means the animal ate only grass its entire life — this label produces the most consistent flavor and nutritional profile.
Grass fed ground beef is noticeably leaner than conventional beef of the same labeled fat percentage. The flavor tends to be earthier, slightly mineral, and more pronounced — which suits the smash burger method particularly well because the crust amplifies that depth.
For where to buy grass fed beef: most natural grocery chains, Whole Foods, and Costco carry it reliably. Grass fed beef bulk purchases directly from farms or online meat delivery services often offer the best value per pound. Look for the 100% grass-fed or grass-finished label for the most reliable product.
Grass fed meat generally contains higher levels of Omega-3 fatty acids and CLA (conjugated linoleic acid) compared to grain-fed beef. The fat-to-protein ratio is different enough that cooking times and temperatures should be adjusted accordingly — lower and faster is almost always the right direction.
03 How to Cook Grass Fed Ground Beef — Key Rules
The same qualities that make grass fed ground beef nutritionally appealing — lower fat, leaner muscle — also make it less forgiving than conventional ground beef. These rules apply whether you are making smash burgers, meatballs, or a weeknight skillet.
▸ Lower Heat, Shorter Time
Conventional ground beef can take some abuse at high heat because the fat keeps it moist. Grass fed ground beef loses moisture faster, so medium to medium-high heat and shorter cooking windows are almost always better.
▸ Exception: Smash Burgers
The smash method is a deliberate exception to the lower-heat rule. The technique works because you are creating an intense, brief contact sear — the crust forms in seconds, locking in flavor before the lean beef has time to dry. Speed and temperature work together rather than against the meat.
▸ Do Not Press, Prod, or Overwork
For any application, handle grass fed ground beef as little as possible. Overworking the meat tightens the protein strands, which compounds the tendency to dry out. Loose-formed patties or gentle mixing for meatballs gives the best texture.
▸ Safe Internal Temperature
Ground beef — grass-fed or otherwise — should reach 160°F (71°C) at the center for food safety, per the USDA safe temperature chart. For smash burgers cooked to a thin patty, this temperature is reached quickly — which is another reason the method works particularly well with this cut.
04 At a Glance — Smash Burger Recipe
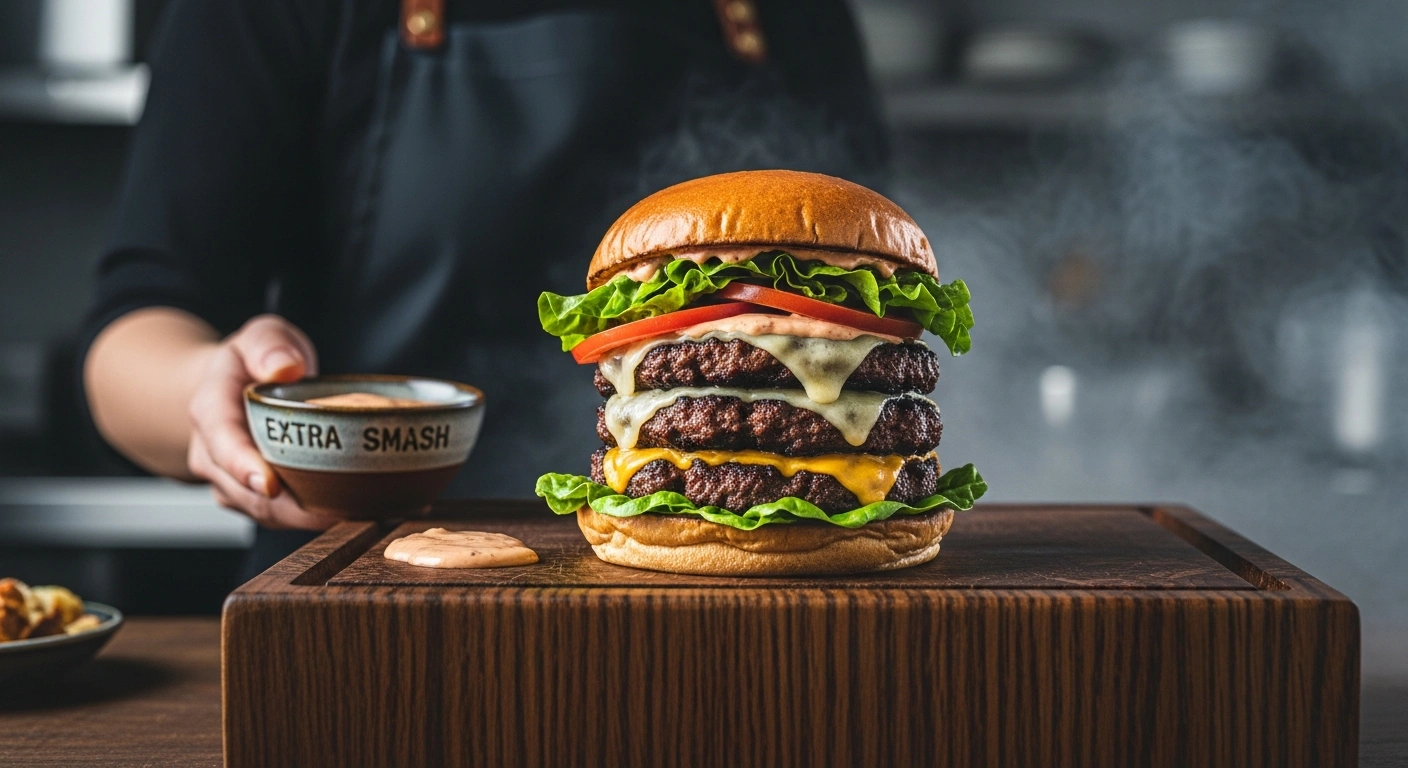
Grass Fed Ground Beef Smash Burgers
A practical smash burger recipe built for grass fed ground beef. Loose-pack balls, a screaming-hot surface, one firm smash, and a proper cheese melt. Done in under 20 minutes — and the leaner beef’s flavor shines through every bite.
05 Ingredients
06 Step-by-Step Instructions
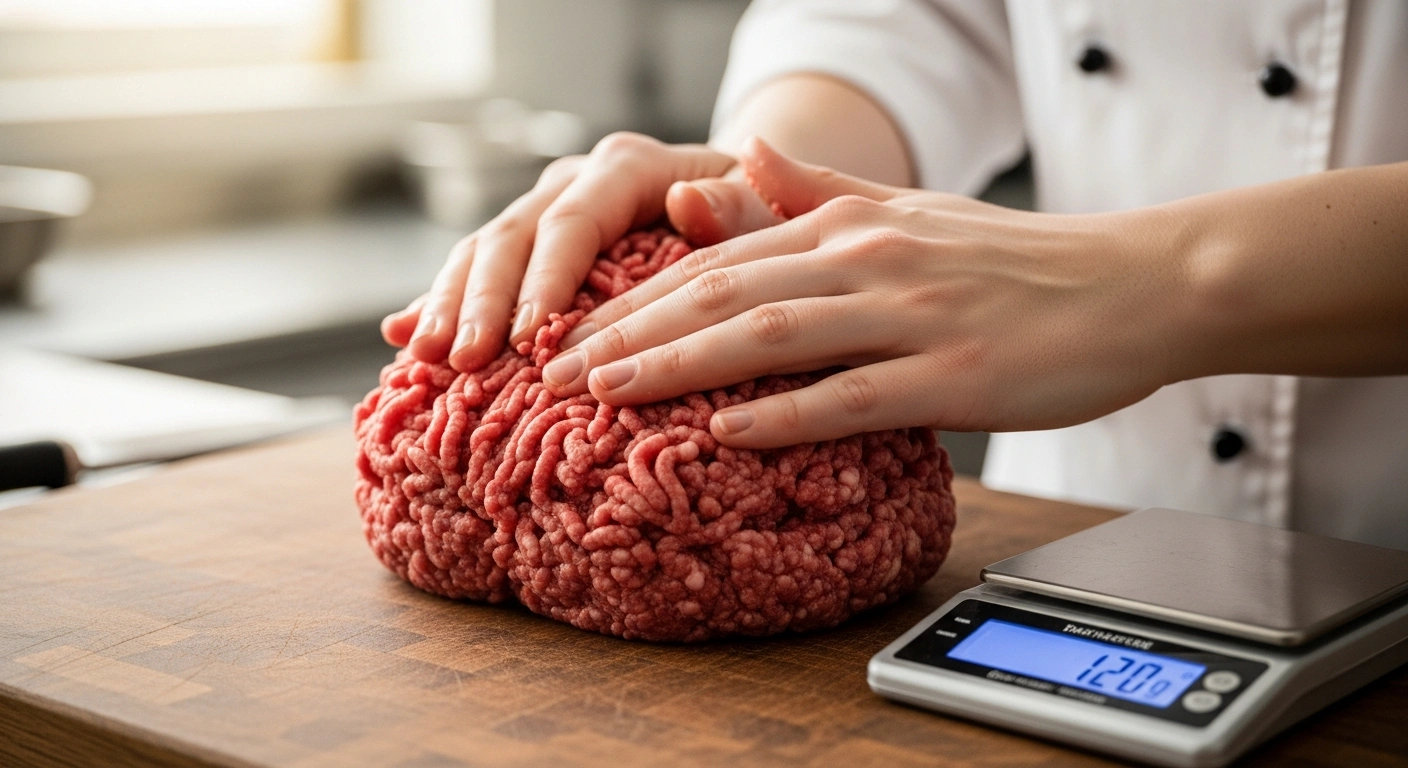
Form the Balls — The Loose Hold
Divide the grass fed ground beef into 4 equal portions of about 4 oz each. Handle the meat as little as possible — just enough to bring each portion together into a rough ball. Do not compress, season, or pack it down. Keep the balls cold in the refrigerator until the pan is ready.
The loose structure is critical. Overworked beef gets dense and loses moisture faster — which is especially important to avoid with leaner grass-fed meat.
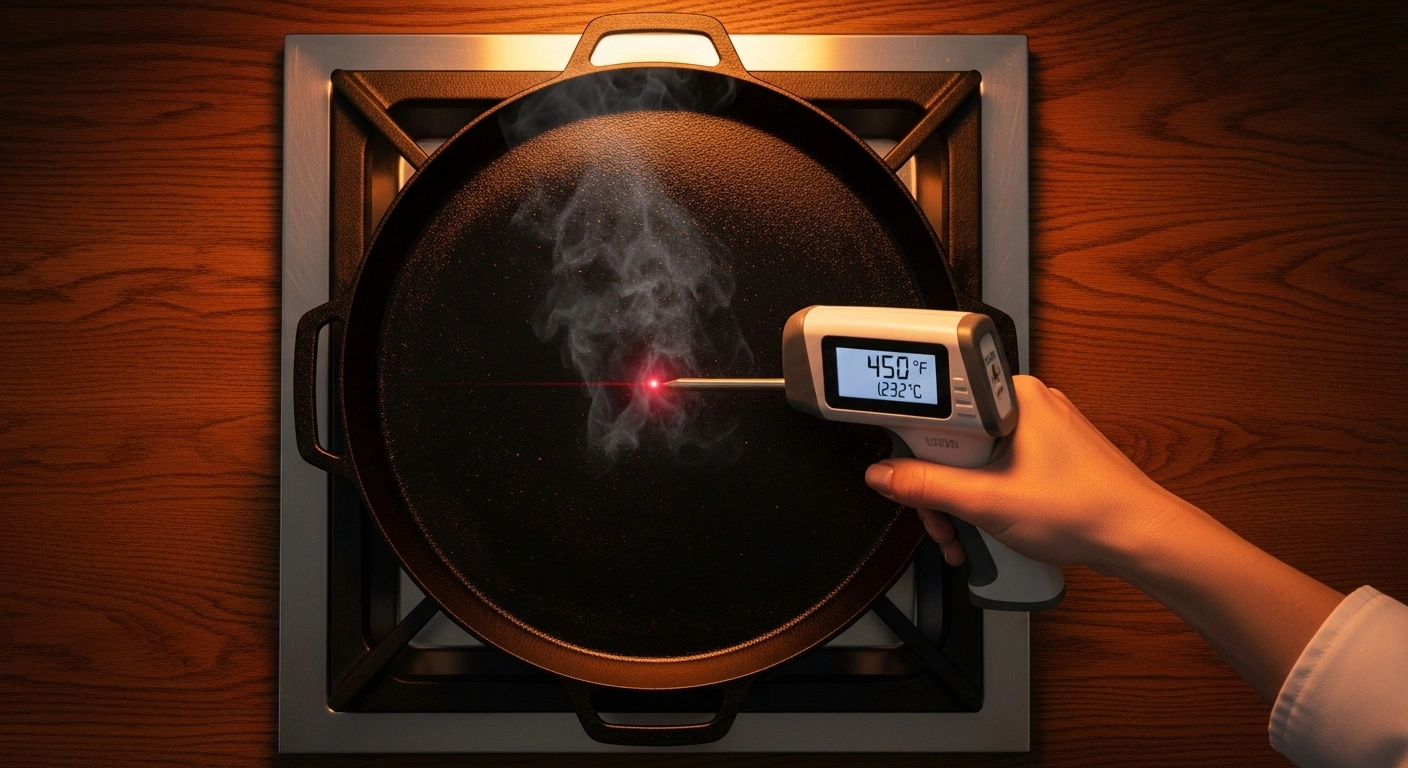
Preheat the Smash Surface — The Searing Heat
Heat a cast iron skillet or flat griddle over high heat for 3 to 5 minutes until it is visibly smoking. Add a thin film of neutral, high-smoke-point oil — avocado or grapeseed work well. The surface must be extremely hot before any beef touches it.
This step is not negotiable. A surface that is merely warm will steam the beef instead of searing it, and you lose the Maillard reaction that makes smash burgers worth making.
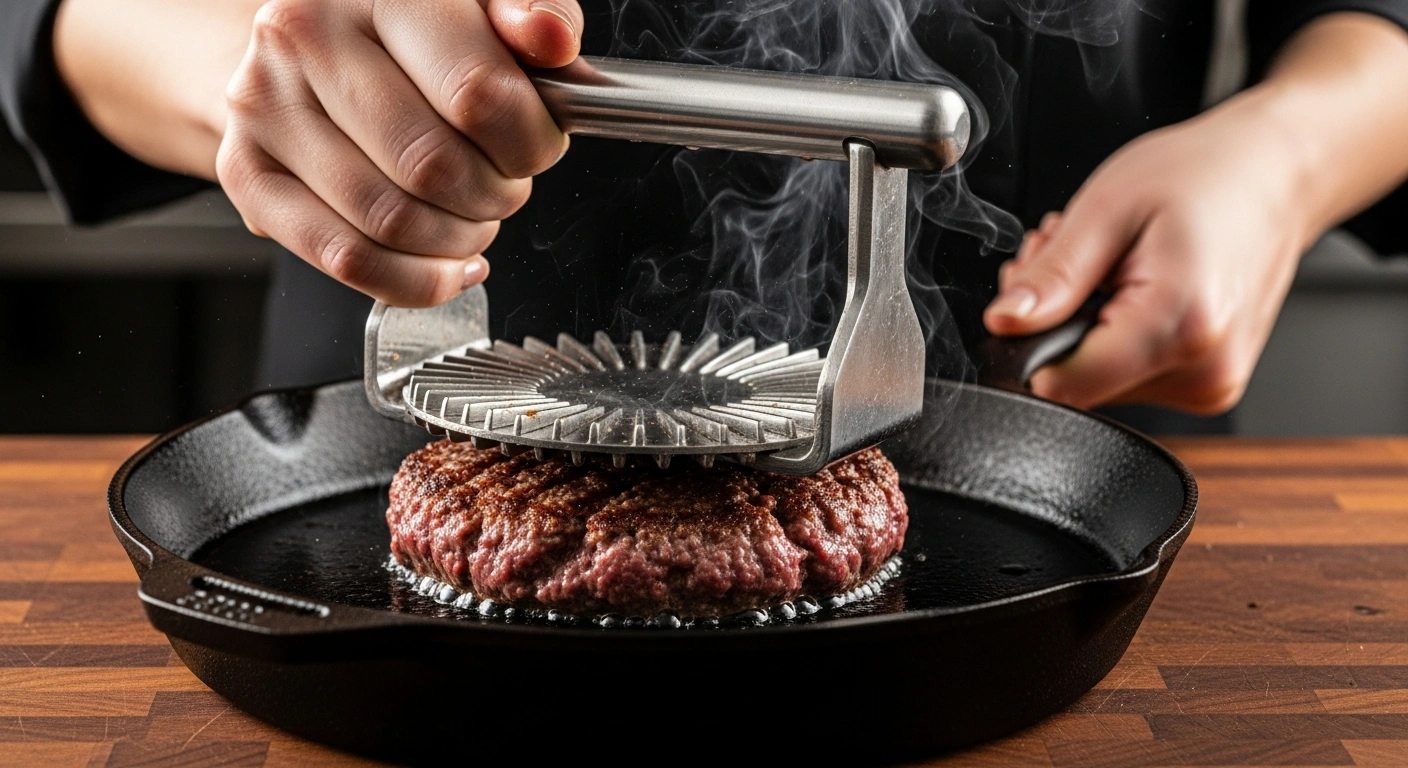
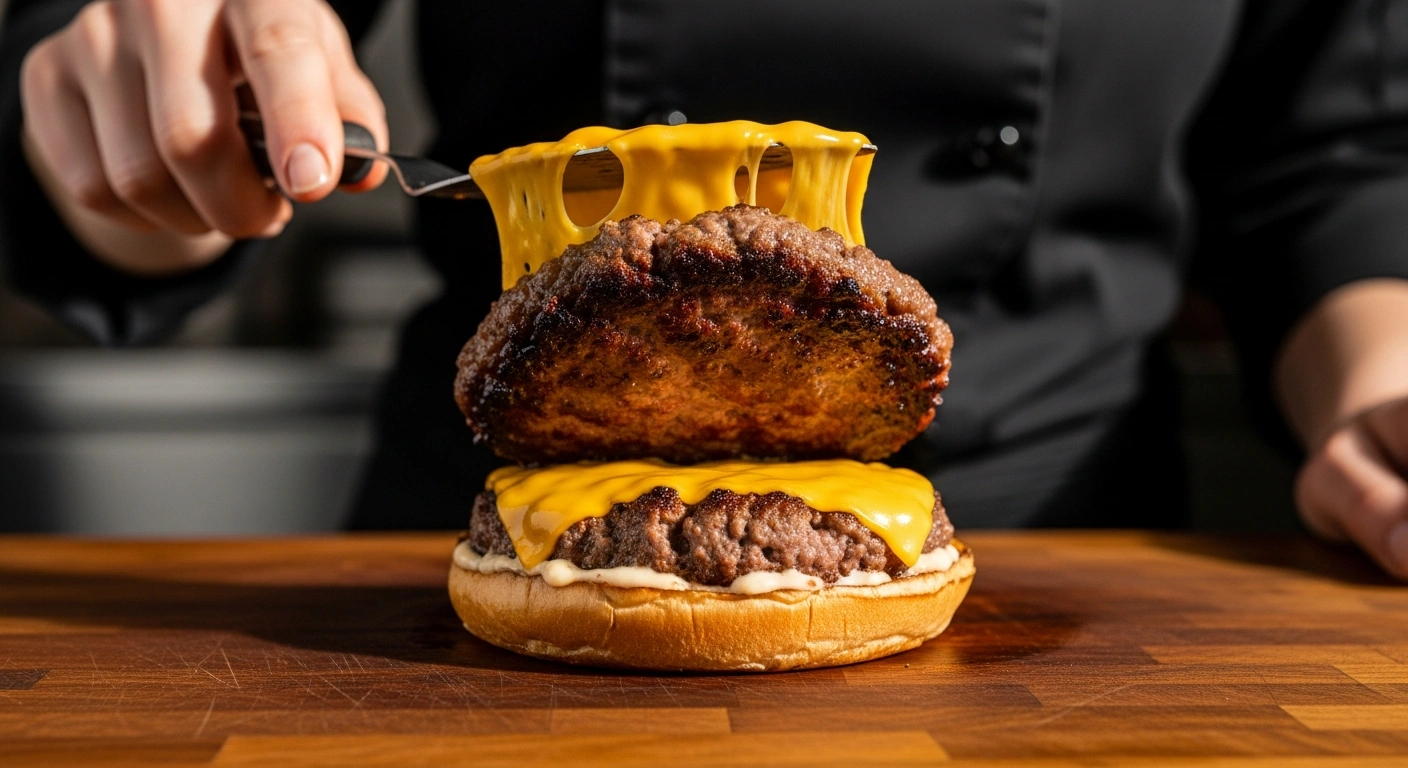
The Smash — The Moment of Pressure
Season each ball with salt and pepper immediately before it hits the pan — not ahead of time. Place the ball on the hot surface and immediately press it flat using a burger press, heavy spatula, or the bottom of a small heavy pan. Press firmly and hold for 10 full seconds.
Do this once and do not press again. A second smash pushes out the juices you just sealed in. Cook for about 90 seconds until the edges are deeply browned and small bubbles of juice are appearing on the top surface.
Cheese and Release — The Melt
Slide a thin, sharp spatula under the patty and flip it in one clean motion. The crust should release easily — if it resists, give it another 15 seconds. Immediately place a slice of American cheese on top of the flipped patty.
Cook for 30 to 45 seconds more. The cheese should be fully melted and the bottom should have formed a second, lighter crust. Remove from the heat promptly — grass fed beef dries out quickly if left too long after the flip.
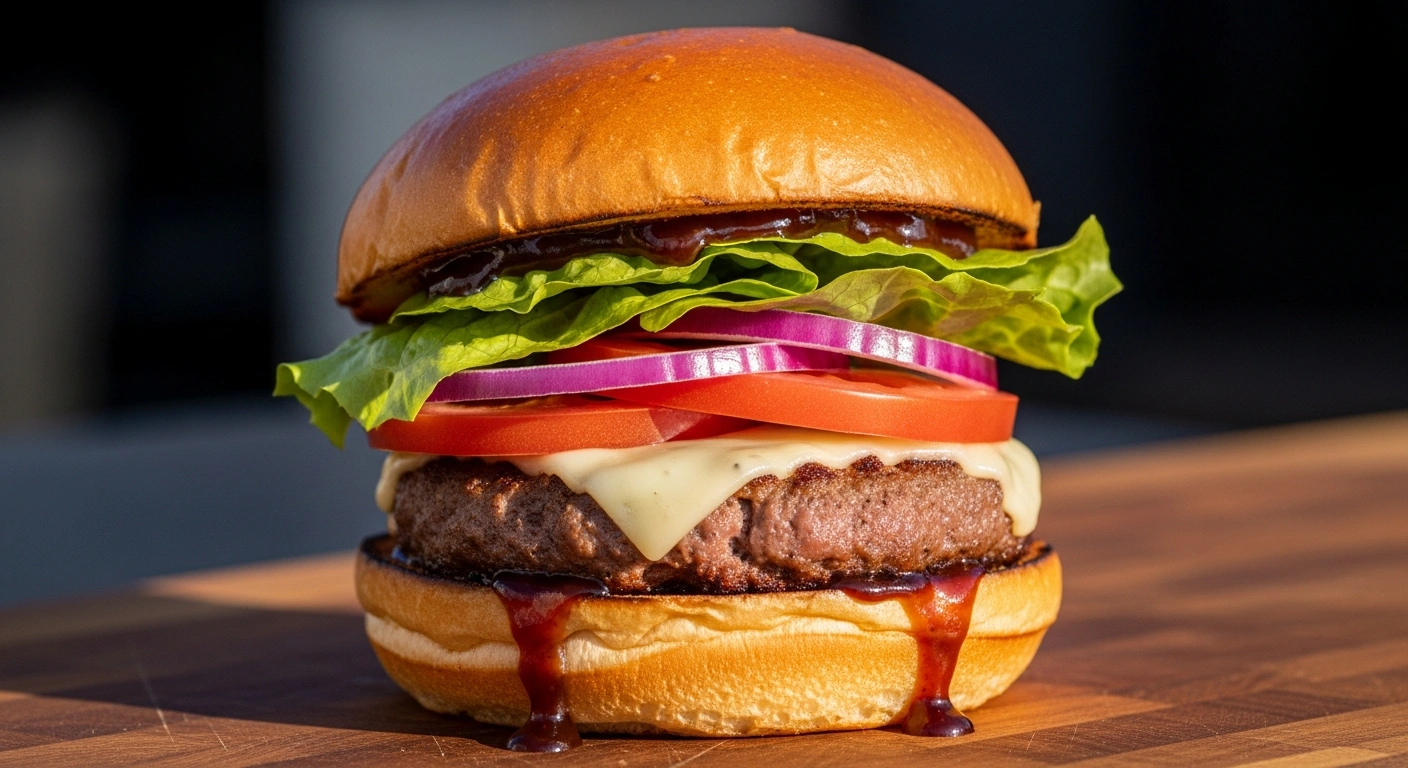
Stack and Serve — The Stack
While the last patties cook, toast the buns cut-side down in butter over medium heat until golden. Mix mayonnaise, ketchup, mustard, and pickle juice into a simple smash sauce and spread it on both halves.
Build the burger and serve immediately. The crust on smash burgers softens quickly once the bun compresses it — these are meant to be eaten right away.
If you enjoy bold beef preparations, our beef and broccoli recipe is another quick, high-heat method that pairs well with grass fed ground beef’s deeper flavor profile.
07 Expert Tips and Common Mistakes
Keep the Beef Cold
Cold balls sear faster and more aggressively than room-temperature beef. Do not let them sit out before cooking.
Surface Must Be Smoking
A warm pan is the enemy of smash burgers. If there is no visible smoke before the beef goes in, wait longer.
One Smash Only
Pressing a second time pushes out the moisture that the first smash just sealed in. Do it once and leave it.
Watch the Flip Timing
With grass fed beef, 90 seconds on the first side is usually enough. Longer risks drying the edges before the flip.
American Cheese for a Reason
It melts faster and more evenly than cheddar or Swiss. The 30-45 second post-flip window favors a quick-melting cheese.
Serve Immediately
Smash burger crusts soften under the weight and moisture of the bun. Build and serve — do not plate ahead.
08 Buying, Storing, and Reheating
Getting the most from grass fed ground beef starts before cooking. Where you buy it and how you store it has a direct effect on the final result.
| Topic | What to Do | Why It Helps |
|---|---|---|
| Buying | Look for 80/20 grass-fed and grass-finished label | Best fat ratio for smash burgers with this leaner beef |
| Bulk Buying | Grass-fed beef bulk from farms or online offers better value | Buying in quantity reduces cost per pound significantly |
| Refrigeration | Use within 1 to 2 days of purchase | Ground beef is more perishable than whole cuts |
| Freezing | Freeze in portions, tightly wrapped, for up to 3 months | Pre-portioning makes weeknight cooking faster |
| Thawing | Thaw overnight in the refrigerator — never on the counter | Safe thawing preserves texture and prevents bacterial growth |
| Leftover burgers | Refrigerate in an airtight container for up to 3 days | Reheat in a hot pan briefly — avoid microwave for best crust |
For safe ground beef handling and storage guidance, the USDA leftovers and food safety page is the most reliable official reference. If you have frozen beef you need to use, see our guide on can you cook frozen meat for safe thawing and direct-cook options.
Meat Nutrition Calculator
Check calories, protein & fat for any meat cut — based on approximate USDA values.
Values are approximate and based on cooked weight per USDA data. For full nutrition data, visit the complete Meat Nutrition Calculator on our homepage.
09 Frequently Asked Questions

Julia writes practical meat recipes and cooking guides for home cooks. Her approach focuses on clear technique, reliable results, and methods that make every cut — including grass-fed beef — easier to cook well.