How to Cook Cast Iron Skillet Chicken Perfectly
There’s something special about pulling a cast iron skillet from your stove. Inside, perfectly golden chicken sizzles. The aroma fills your kitchen, drawing your family to the warmth and promise of a delicious meal.
Cast iron cooking unlocks flavors that other cookware can’t reach. Your skillet becomes a trusted partner in the kitchen, learning your cooking style over time. Whether you’re cooking for yourself or hosting friends, mastering cast iron chicken will transform your cooking.
This guide will walk you through each step. You’ll learn the techniques that make good chicken great. From selecting the right cut to achieving that crispy, golden skin, you’ll gain confidence with every cook.
Your cast iron skillet is ready to deliver results. Let’s begin this journey together and discover how simple cooking can taste so remarkable.
Table of Contents
Why Cast Iron Skillets Are Perfect for Cooking Chicken
Cast iron skillets are a top choice for cooking chicken at home. They offer unique benefits that other pans can’t match. These benefits make cooking chicken easier and tastier.
Using a quality cast iron skillet can really improve your cooking. You’ll notice the difference right away. This is why cooks keep coming back to cast iron year after year.
Superior Heat Retention and Distribution
Cast iron holds heat better than most other surfaces. It keeps the temperature steady and even. This means your chicken cooks evenly without burning one side and leaving the other raw.
The thick metal of cast iron takes longer to heat up. But once it’s hot, it keeps the temperature constant. This leads to better browning and even cooking compared to thin pans.
Natural Non-Stick Properties When Properly Seasoned
A well-seasoned cast iron skillet has a natural non-stick coating. This coating builds up over time with oils and fats. Your chicken will slide across the surface without sticking.
- Reduces the need for extra cooking oils
- Creates a darker, richer crust on your chicken
- Makes cleanup easier after cooking
- Improves with every use when properly maintained
Versatility from Stovetop to Oven
Cast iron skillets work on your stovetop and in your oven. You can start cooking chicken on the burner for a crispy skin. Then, move it to the oven to finish cooking. This method saves time and effort while enhancing flavors.
Your cast iron skillet can handle high oven temperatures without damage. This makes it ideal for recipes that need stovetop searing and oven baking. You only need one pan from start to finish, making cleanup easier.
Choosing the Right Chicken Cuts for Your Skillet
Choosing the right chicken cuts is crucial for cast iron skillet cooking. Different cuts have unique cooking times and textures. You need to pick pieces that work well with high heat and your cooking method.
Each chicken cut adds something special to your skillet meals. Some pieces cook faster, while others stay juicy with longer cooking times. Knowing these differences helps you plan better dinners and get perfect results every time.
Popular Chicken Cuts for Skillet Cooking
You have several great options when choosing chicken for your cast iron skillet:
- Chicken Thighs – Dark meat that stays moist and develops crispy skin beautifully
- Chicken Breasts – Lean white meat perfect for quick weeknight dinners
- Chicken Drumsticks – Budget-friendly cuts with excellent flavor and texture
- Bone-In Chicken – Creates rich flavors and keeps meat tender during cooking
- Boneless Chicken – Cooks faster and makes plating easier for presentations
- Chicken Wings – Great for appetizers and casual family meals
| Chicken Cut | Cooking Time | Best For | Texture Result |
|---|---|---|---|
| Chicken Thighs | 25-30 minutes | Crispy skin dishes | Juicy and flavorful |
| Chicken Breasts | 15-20 minutes | Quick weeknight meals | Tender when not overcooked |
| Drumsticks | 30-35 minutes | Family dinners | Moist with crispy edges |
| Bone-In Breasts | 20-25 minutes | Special dinners | Very juicy and flavorful |
| Wings | 20-25 minutes | Appetizers and snacks | Crispy skin exterior |
Matching Cuts to Your Cooking Style
Think about your cooking approach when picking chicken cuts. Bone-in pieces work well with the stovetop-to-oven method. The bones transfer heat evenly and keep the meat moist inside. For quick pan-searing on the stovetop, boneless breasts cook fast and finish in minutes.
Dark meat from thighs and drumsticks forgives small cooking mistakes better than white meat. These cuts stay juicy even with slightly longer cooking times. If you prefer leaner options, boneless breasts deliver less fat while still tasting delicious when cooked properly.
Your cast iron skillet handles all these cuts beautifully. The key is matching the cut to your recipe and available cooking time. This preparation step ensures your chicken turns out perfectly every single time.
Essential Preparation Steps Before Cooking
Getting your chicken ready before cooking is key to a great dish. Don’t rush this step. Proper preparation ensures your chicken turns out delicious.
Bringing Chicken to Room Temperature
Take your chicken out of the fridge 20 to 30 minutes before cooking. Cold chicken cooks unevenly. This can lead to burnt outsides and raw insides.
Room temperature chicken cooks better in your cast iron skillet. This simple step helps you get consistent results every time.
Patting Dry for Maximum Crispiness
Moisture on the chicken’s surface prevents crispy skin and browning. Use paper towels to dry both sides of the chicken. Don’t forget the areas under skin flaps on bone-in cuts.
This step is crucial. It allows the Maillard reaction to happen. This reaction creates complex flavors and a great texture.
The Maillard reaction is a chemical process that happens when proteins and sugars heat up. It only works when your chicken is dry. Wet chicken steams instead of sears. Think of it this way: dry chicken equals golden, crispy results in your cast iron skillet.
- Pat the skin side completely dry
- Turn the chicken and dry the bottom
- Lift skin flaps and dry underneath
- Use fresh paper towels if the first ones get too wet
- Don’t be gentle—press firmly to remove all moisture
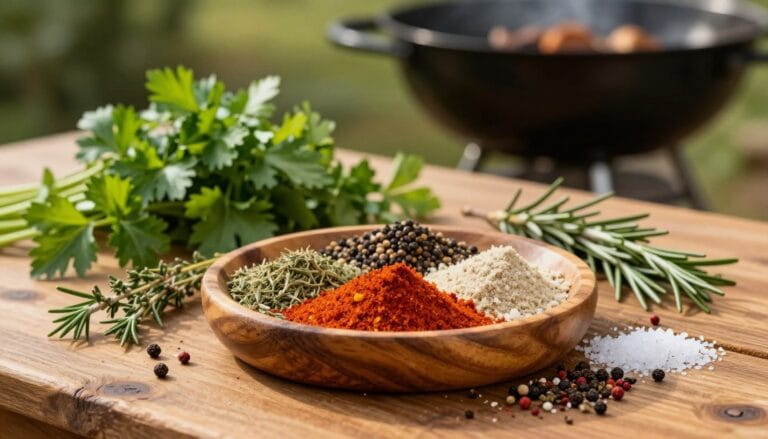
Seasoning Techniques That Make a Difference
Your seasoning approach depends on your timeline and flavor goals. You can keep things simple with just salt and pepper, or you can explore complex spice rubs, brines, and marinades. Each method brings different benefits to your cast iron skillet chicken preparations.
Timing matters when you season. Salt draws out moisture initially, but then it helps that moisture reabsorb for juicier meat. If you season several hours ahead, the salt has time to work its magic. The chicken becomes more tender and flavorful. For quick cooking, season right before the chicken hits the pan.
| Seasoning Method | Best Timing | Flavor Profile | Best For |
|---|---|---|---|
| Salt and Pepper | Immediately before cooking | Simple, clean taste | Weeknight meals |
| Spice Rubs | 30 minutes to 2 hours ahead | Bold, layered flavors | Special dinners |
| Brines | 4 to 12 hours ahead | Moist, deeply seasoned | Whole birds or thighs |
| Marinades | 2 to 8 hours ahead | Tender, infused flavors | Boneless breasts |
To layer flavors for maximum impact, combine your techniques. Start with a brine for moisture, add a spice rub for surface flavor, and finish with fresh herbs right before serving. This approach transforms ordinary cast iron skillet chicken into restaurant-quality meals you’ll be proud to serve.
“Great chicken starts before the pan even gets hot. Your preparation work determines your success.”
Getting Your Cast Iron Skillet Ready for Cooking
Preparing your cast iron skillet is key before cooking chicken. A well-prepared skillet helps get crispy, golden skin and juicy meat. It ensures your chicken cooks evenly and gets that restaurant-quality crust everyone loves.
Your cast iron skillet must be clean and dry before cooking. Start by wiping it with a paper towel to remove dust or debris. If there’s residue from before, wash it with warm water and a soft sponge. Dry it completely with a clean cloth. Any moisture can stop proper searing and create steam instead of a golden crust.

Getting your skillet to the right temperature is crucial. Place it on your stovetop over medium-high heat for two to three minutes. When a drop of water sizzles and evaporates right away, it’s ready for searing chicken.
Add your cooking oil or fat to the hot skillet. Use oils like avocado oil, grapeseed oil, or vegetable oil. These oils handle high heat well. Pour about one to two tablespoons into the center and tilt the skillet to coat the bottom evenly.
- Let the oil heat for 30 seconds after pouring
- Watch for slight shimmering across the surface
- Never skip this step—it prevents sticking
- Check that your oil moves freely in the pan
Your cast iron skillet is now ready for your chicken. The right cleaning, temperature, and oil create the perfect cooking environment. This ensures crispy, delicious results every time.
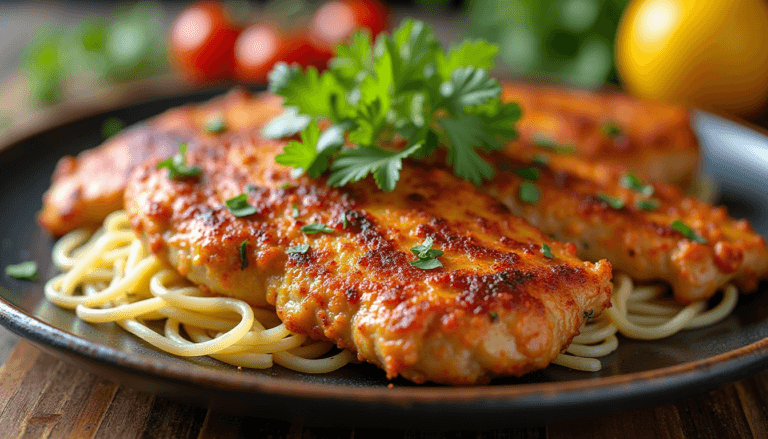
Mastering the Perfect Cast Iron Skillet Chicken
Your cast iron skillet is a powerful tool when you know the right techniques. It’s all about managing heat, timing, and moisture for top results. Each chicken cut needs a unique approach to shine in your skillet.
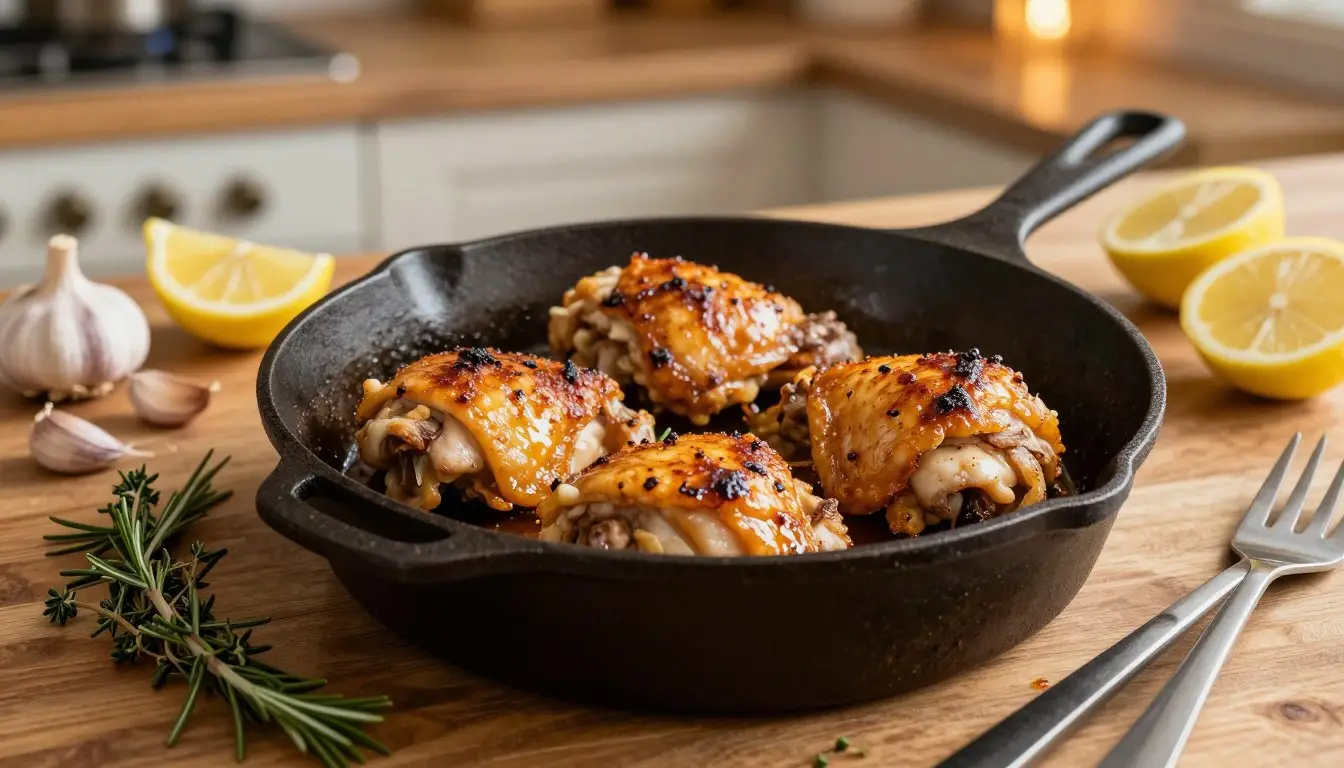
Achieving Crispy Skin on Chicken Thighs
Chicken thighs are great for crispy skin in a cast iron skillet. Start with the skin down on medium-high heat. Let it cook for 5-7 minutes without moving.
This way, the fat renders out, making the skin golden and crunchy. Flip the thighs and cook for another 5-8 minutes. Be patient and don’t move the chicken too much. Thighs need to reach 165°F internally for safety and stay juicy.
Cooking Boneless Chicken Breast Without Drying Out
Boneless chicken breasts can dry out quickly. Pound them to an even thickness before seasoning. This ensures even cooking.
Use medium heat and cook for 6-7 minutes per side. The stovetop method alone works best for thin breasts. Avoid overcooking by checking with a meat thermometer.
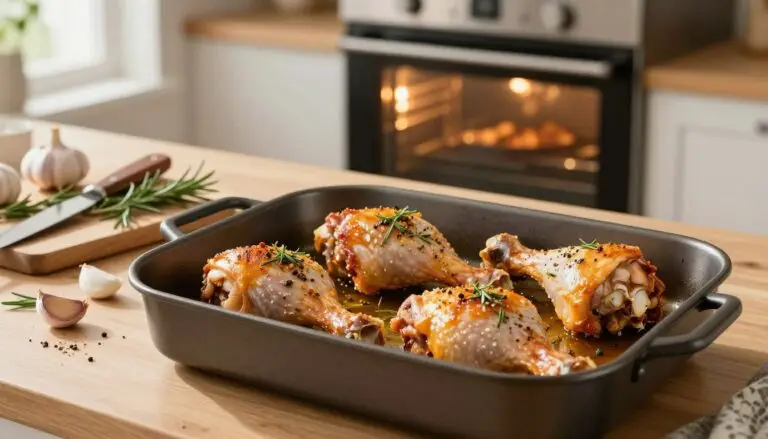
The Stovetop to Oven Method Explained
This two-stage method is perfect for thick chicken pieces. Start on the stovetop at medium-high heat for 3-4 minutes per side. This creates a flavorful crust.
Then, move the skillet to a preheated 375°F oven. Bake for 10-15 minutes based on thickness. This method prevents overcooking and ensures the inside is cooked right. It also makes cleanup easy.
| Chicken Cut | Stovetop Time | Oven Time | Internal Temperature | Total Time |
|---|---|---|---|---|
| Bone-in Thighs | 5-7 minutes per side | 8-12 minutes | 165°F | 20-30 minutes |
| Boneless Breasts | 6-7 minutes per side | 5-8 minutes | 165°F | 17-22 minutes |
| Bone-in Breasts | 4-5 minutes per side | 10-15 minutes | 165°F | 24-35 minutes |
| Chicken Drumsticks | 4-6 minutes per side | 15-20 minutes | 165°F | 25-35 minutes |
Master these cast iron skillet chicken techniques for delicious meals every time. The stovetop searing and oven finishing create chicken with a flavorful crust and moist interior.
Temperature Guidelines and Cooking Times
Getting the right temperature and cooking time is key to making perfect cast iron skillet chicken. Your meat needs to reach a safe internal temperature. The timing depends on what cut you’re using. Understanding these guidelines helps you cook chicken that stays juicy on the inside while developing a golden, crispy exterior.
The safe internal temperature for all chicken is 165°F, measured with a meat thermometer at the thickest part of the meat. This temperature kills harmful bacteria and makes your chicken safe to eat. Different cuts cook at different speeds, so you need to adjust your timing based on what you’re preparing.
Here’s what you need to know about cooking times for your cast iron skillet chicken:
| Chicken Cut | Thickness | Stovetop Time | Internal Temperature | Rest Time |
|---|---|---|---|---|
| Bone-in Thighs | ¾ to 1 inch | 12-15 minutes | 165°F | 5 minutes |
| Boneless Breasts | ¾ inch | 6-8 minutes | 165°F | 3 minutes |
| Chicken Drumsticks | 2-3 inches | 15-18 minutes | 165°F | 5 minutes |
| Whole Chicken Pieces | Varies | 20-25 minutes | 165°F | 10 minutes |
Start your cast iron skillet at medium-high heat (around 375°F to 400°F for your oven method). Sear chicken skin-side down for 3-4 minutes until golden brown. Flip and sear the other side for 2-3 minutes. Then transfer your skillet to a preheated 425°F oven to finish cooking.
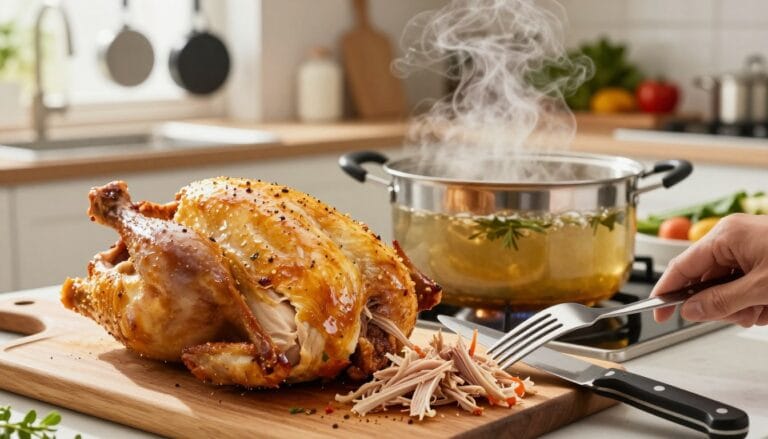
Always let your cooked chicken rest for a few minutes before cutting into it. Resting allows the juices to settle back into the meat, keeping it moist and tender. Use an instant-read thermometer to check doneness. Insert it into the thickest part without touching bone to get an accurate reading.
- Preheat your cast iron skillet properly before adding chicken
- Use medium-high heat on the stovetop for searing
- Check temperature with a meat thermometer, not by sight alone
- Rest your chicken after cooking for best results
Thicker cuts need more cooking time than thin ones. Boneless chicken breast cooks faster than bone-in thighs. Adjust your timing based on the actual thickness of your pieces, not just the type of cut you’re using. Your meat thermometer is your best tool for perfect results every single time.
One Pan Chicken Skillet Recipes to Try Tonight
Cast iron skillet chicken dishes make your meals feel like they’re from a restaurant, but with less cleanup. The magic of one pan cooking is that it builds flavors while keeping everything in one place. Your cast iron skillet turns into a cooking station where chicken and other ingredients cook together perfectly. These recipes are great for busy weeknights and weekend gatherings.
Easy Weeknight Chicken Dinner Ideas
Quick chicken skillet meals save you time without losing flavor. Start by searing boneless chicken breasts or thighs in your preheated cast iron skillet with oil or butter. Once you get that golden brown crust, you can build your dish in minutes.
Here are some simple options for your weeknight meals:
- Lemon garlic chicken with fresh herbs
- Honey mustard glazed chicken thighs
- Italian seasoned chicken with tomato sauce
- Cajun spiced chicken breasts
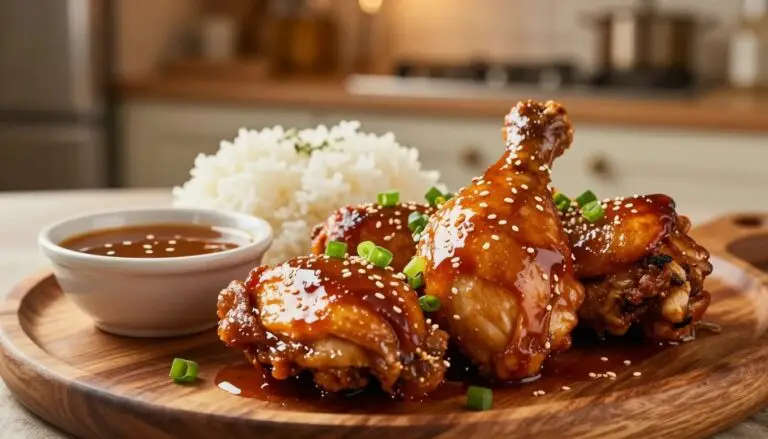
- Teriyaki chicken with ginger
Each recipe cooks in under 30 minutes. The cast iron skillet keeps the heat steady, so your chicken stays moist and the skin gets crispy. You can finish cooking by either keeping the skillet on the stovetop or moving it to a preheated 375°F oven for 10-15 minutes.
Adding Vegetables for a Complete Meal
Make your chicken skillet a balanced dinner by adding fresh vegetables. Add them at the right moment so everything cooks at the same time.
| Vegetable | Cut Size | When to Add | Cooking Time |
|---|---|---|---|
| Bell peppers | 1-inch chunks | After chicken browns | 8-10 minutes |
| Zucchini | Half-moon slices | With bell peppers | 8-10 minutes |
| Broccoli florets | Bite-sized pieces | Before oven stage | 10-12 minutes |
| Cherry tomatoes | Whole or halved | Final 5 minutes | 5 minutes |
| Red onion | Thin wedges | After chicken browns | 10-12 minutes |
| Mushrooms | Sliced | With other vegetables | 8-10 minutes |
Push vegetables to the sides of your skillet as you cook chicken in the center. This lets you control the doneness of each ingredient. The cast iron’s superior heat distribution ensures vegetables caramelize beautifully while your chicken cooks perfectly.
Add finishing touches like fresh basil, parmesan cheese, or a squeeze of lemon juice. Your complete one pan chicken skillet meal requires just one dish to wash and delivers nutritious dinners your family will love.
Common Mistakes to Avoid When Pan Searing Chicken
Pan searing chicken in cast iron needs careful attention. Many cooks face issues like dry meat, uneven cooking, or a bad crust. Knowing what not to do is key to mastering this technique and achieving top-notch results at home.

One big mistake is overcrowding the skillet. Too many chicken pieces lead to steam instead of a crispy exterior. Make sure each piece has enough room. Cook in batches if you have to. This way, you’ll get better texture and taste.
Another error is using low heat. Cast iron skillets need medium-high heat for a good sear. Chicken cooked on low heat stays moist and becomes pale and rubbery. Trust the heat. Your cast iron can handle it and will give you excellent browning.
Here are other critical mistakes to avoid:
- Moving the chicken too early—let it sit undisturbed for 3-4 minutes per side
- Skipping the room temperature step—cold chicken cooks unevenly
- Neglecting to pat the surface dry—moisture prevents crisping
- Using old or rancid oil—fresh oil ensures better flavor and color
- Covering the skillet while searing—steam ruins your crust
- Forgetting to check internal temperature—prevents undercooked or dry chicken
Another mistake is poor seasoning timing. Salt draws out moisture, so season your chicken just before cooking, not hours ahead. This keeps your sear intact and your meat juicy.
Skipping the oven finish is a missed chance. After searing your chicken on the stovetop, put it in a preheated 375°F oven to cook through. This method ensures crispy skin with moist, tender meat inside.
Cleaning and Maintaining Your Cast Iron After Cooking Chicken
Your cast iron skillet needs proper care after each use. Cleaning and maintaining it ensures it lasts for many years. Caring for cast iron is easy and quick if you follow the right steps.
Proper Cleaning Techniques
Start cleaning your skillet while it’s still warm. Use a spatula to scrape out food particles. This step prevents buildup and keeps your pan clean.
Rinse your skillet under warm water next. Modern dish soaps are safe for cast iron, as long as you don’t soak it. Use hot water and a small amount of mild dish soap for a quick wash.
For general cleaning, a brush or non-abrasive scrubber works best. Avoid steel wool or aggressive scrubbing to protect your seasoning. Your skillet needs gentle care.
Stubborn stuck-on bits need special attention. Try using coarse salt as a gentle abrasive. You can also simmer water in the pan to loosen debris.
The most important step is to dry the skillet immediately to prevent rust. Use a clean cloth or paper towel to wipe away all moisture. If water sits on the surface, your cast iron will develop rust spots.
| Cleaning Method | When to Use | Benefits |
|---|---|---|
| Scraping with spatula | Right after cooking | Removes food particles safely |
| Warm water rinse | During all cleanups | Basic moisture removal |
| Brush or non-abrasive scrubber | For regular cleaning | Gentle on seasoning layer |
| Coarse salt abrasive | For stuck-on food | Removes debris without damage |
| Simmering water | For stubborn buildup | Loosens particles naturally |
| Immediate drying | After every wash | Prevents rust formation |
Re-Seasoning Your Skillet
Re-seasoning is needed when your skillet’s performance changes. Look for signs like food sticking more, a dull or patchy surface, or needing aggressive cleaning. These are signs it’s time to refresh your seasoning.
The re-seasoning process starts with a thorough cleaning and drying. Ensure every bit of moisture is gone before applying oil. Use a thin layer of high-smoke-point oil like avocado or grapeseed oil on the entire surface, inside and out.
Bake your skillet upside-down in a hot oven at 500°F for one hour. Place a baking sheet on the rack below to catch any drips. This high heat bonds the oil to your pan, creating a stronger seasoning layer.
Regular cooking of fatty foods like chicken naturally maintains and improves your seasoning. Each meal makes your cast iron more non-stick and easier to use. Your skillet gets better with every delicious chicken dinner you cook.
- Watch for food sticking as a sign you need re-seasoning
- Look for dull or patchy spots on the surface
- Clean thoroughly before applying oil
- Use only thin layers of high-smoke-point oil
- Bake upside-down to prevent oil pooling
- Allow complete cooling before using your skillet again
Conclusion
Cooking chicken in a cast iron skillet gets better with practice. You’ll get better at timing, temperature, and technique with each try. Preparing the chicken and skillet right is key to success.
Mastering heat control and knowing cooking times and temperatures will come naturally. Start trying out different cuts, seasonings, and recipes. Find what you like and adjust to your taste and family’s needs.
Avoiding common mistakes becomes easier with practice. Your cast iron skillet will make delicious meals with crispy skin and juicy meat. It’s a skill that connects you to home cooks through the ages.
Your skillet is a long-term investment if you take care of it. It gets better with each use. The joy of making memorable meals with it is worth the effort.
Start cooking tonight and use what you’ve learned. Whether it’s a simple dinner or a special meal for guests, these techniques will help. Your cast iron skillet is ready to make chicken that everyone will love.