How to Cook Tri Tip: Tips for Oven and Grill
There’s magic in pulling a perfectly cooked steak from your oven or grill. The moment you slice into it and see the pink, juicy center is rewarding. If you’ve never cooked tri tip before, you’re in for a treat.
Tri tip is a triangular cut from the bottom sirloin known for its flavor and tenderness. It’s affordable and offers restaurant-quality results. You don’t need culinary training to cook tri tip. Just know the right temperature, seasoning, and method.
The West Coast has loved tri tip for decades. California barbecue fans know its value. Now, home cooks everywhere are discovering its secret. Whether you use your oven for ease or grill for smokiness, both methods work well.
This guide will teach you everything about cooking tri tip. You’ll learn how to pick the best cut and the exact temperatures to aim for. You’ll also master slicing techniques to keep the meat tender and juicy. By the end, you’ll cook tri tip with confidence every time.
Table of Contents
What Makes Tri Tip a Perfect Cut for Home Cooking
Tri tip is a top choice for home cooks who want to cook without spending hours. It’s a triangular cut that offers great flavor and tenderness at a good price. Knowing why tri tip is great helps you enjoy cooking it.
The cut’s size is perfect for family dinners. Tri tip steaks weigh 1.5 to 2.5 pounds, serving four to six people. This size lets you try different cooking methods without wasting meat or money.
Tri tip beef has the right mix of fat and lean meat. This balance gives it rich flavor without too much grease. Its even thickness ensures it cooks well in the oven or on the grill.
Tri tip is very versatile in cooking methods. Here are some benefits:
- Works well with oven-roasting for consistent results
- Performs beautifully on the grill with direct and indirect heat
- Takes well to smoking for deeper flavors
- Accepts simple salt and pepper or complex spice rubs
- Pairs with robust seasonings and marinades
The triangular shape is a plus. It allows for different sections to cook at different rates. This makes it easy to serve guests with different doneness preferences.
Cost-effectiveness is another reason to learn how to cook tri tip. It’s cheaper than premium steaks but tastes just as good. Learning to cook tri tip is a smart move for your cooking skills.
| Feature | Tri Tip | Ribeye | New York Strip |
|---|---|---|---|
| Weight Range | 1.5–2.5 lbs | 1–1.5 lbs | 1–1.5 lbs |
| Price per Pound | $8–$12 | $15–$22 | $14–$20 |
| Marbling Level | Moderate | High | Moderate to High |
| Cooking Methods | Oven, Grill, Smoke | Grill, Pan-sear | Grill, Pan-sear |
| Servings | 4–6 people | 2–3 people | 2–3 people |
Tri tip’s beefy flavor is perfect for bold seasonings or simple rubs. It takes flavors well, making it great for beginners. The meat’s natural taste shines through, enhancing any dish.
Learning to cook tri tip opens up new possibilities in home cooking. It’s a skill that impresses others and keeps your budget in check.
Selecting and Preparing Your Tri Tip Steak
Choosing the right tri tip from your butcher is key to a great meal. The quality of your meat and prep work affect the taste and texture of your steak. Whether you’re using the oven, grill, or reverse sear, proper preparation is crucial.
Choosing Quality Tri Tip at the Butcher
When you’re at the butcher or grocery store, look for certain signs of quality tri tip. The meat should have a bright red color. It should also have moderate marbling, which makes the meat tender and flavorful.
The fat cap on top of the steak is important. A quarter-inch thick fat cap is ideal for most cooking methods. You’ll find two types at the butcher:
- Peeled tri tip (fat cap removed)
- Untrimmed tri tip (fat cap intact)
Many cooks prefer the untrimmed tri tip for its flavor and moisture. Choose USDA Choice for great value or Prime for the best marbling.
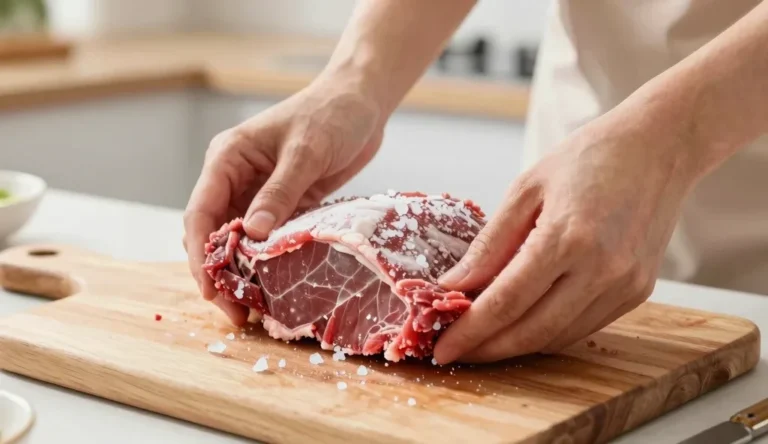
Trimming and Bringing to Room Temperature
Before cooking, remove the silver skin. You can also trim the fat cap to a quarter-inch. This balance is key for different cooking methods.
Let your tri tip sit at room temperature for 30 to 45 minutes. This ensures even cooking. Pat the surface dry with paper towels to improve browning and seasoning adhesion.
| Preparation Step | Time Required | Purpose |
|---|---|---|
| Remove silver skin | 5-10 minutes | Improves texture and browning |
| Trim fat cap to quarter-inch | 5 minutes | Balances flavor and moisture |
| Bring to room temperature | 30-45 minutes | Ensures even cooking throughout |
| Pat dry with paper towels | 2-3 minutes | Enhances browning and seasoning adhesion |
By following these steps, you’re ready for any tri tip cooking method you choose.
Essential Seasoning Techniques for Tri Tip
Seasoning your tri tip steak right can make a meal unforgettable. You can use just salt and pepper for a simple yet flavorful taste. Or, you can add complex layers with bold seasonings. The trick is to know what works best for this cut and how to apply flavors well.
The classic seasoning method comes from California’s Santa Maria region. It’s simple yet packs a punch. You’ll need basic pantry items that boost the meat’s natural taste.
- Salt and pepper only—a minimalist approach that lets the beef shine
- Dry rubs with garlic powder, black pepper, and smoked paprika
- Santa Maria blend featuring salt, pepper, garlic powder, and cayenne
- Wet marinades for deeper flavor penetration
- Salt-resting method for superior crust development
For dry rubs, use one to two tablespoons per pound of meat. Rub the seasoning into the meat’s surface firmly. Season right before cooking or refrigerate uncovered for up to 24 hours. Longer times allow flavors to penetrate deeper.
Wet marinades should be used for two to four hours. Longer times can make the meat mushy. The salt-resting technique involves salting the meat heavily and refrigerating it uncovered for hours. This method helps the meat brown better during cooking.
Remember the fat cap. Score it lightly before seasoning. This helps flavors penetrate and promotes better fat rendering during cooking.
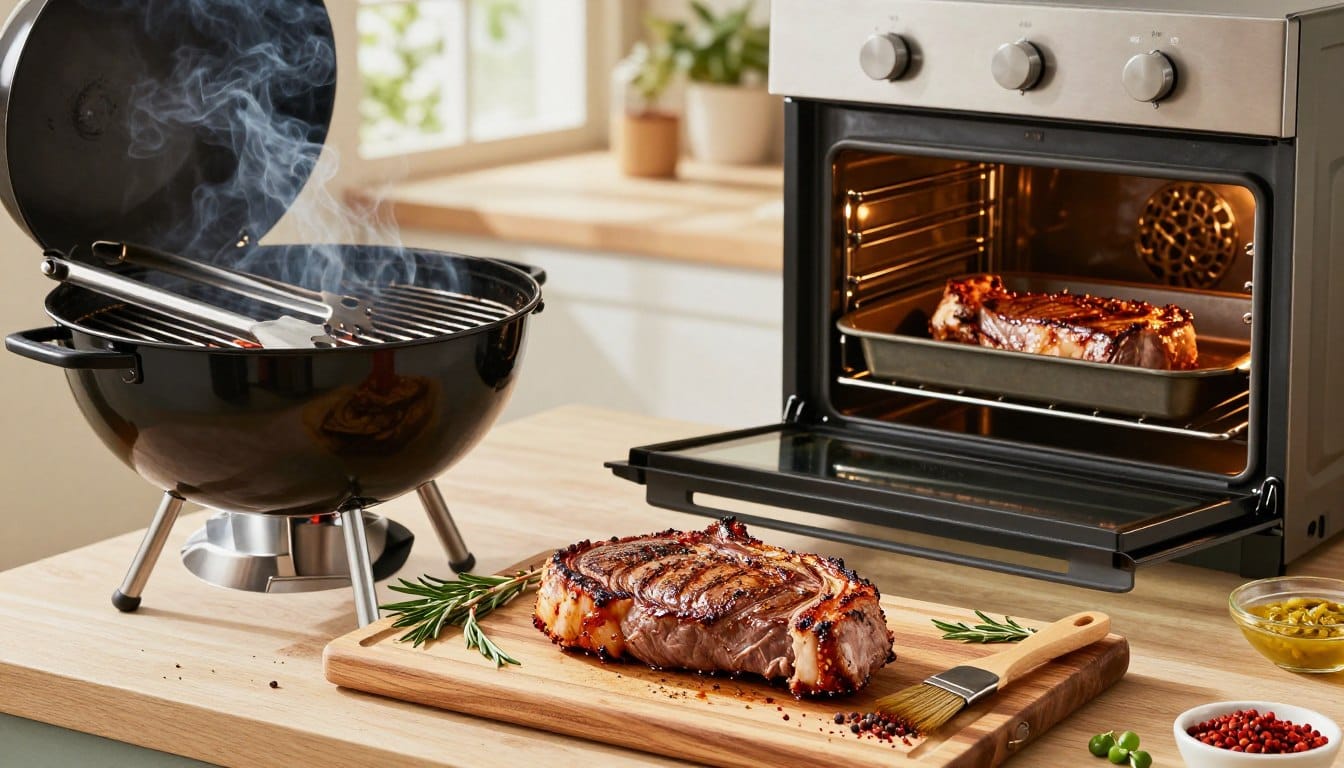
How to Cook Tri Tip in the Oven
Oven-roasting is a reliable way to cook tri tip. It ensures tender and flavorful meat. Knowing the right oven temperature and timing is key.
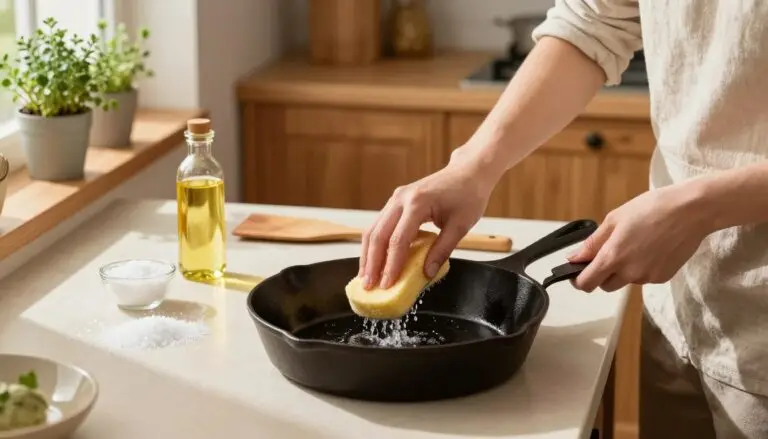
Success in oven-roasting depends on managing heat and timing. Use an oven-safe skillet or roasting pan. Cast iron and stainless steel pans are best because they heat evenly.
Setting the Right Oven Temperature
Start by searing your tri tip at 450 to 500 degrees Fahrenheit. This step takes 10 to 15 minutes. It creates a golden, flavorful crust.
Then, lower the oven heat to 325 to 350 degrees Fahrenheit. This lets the inside cook evenly. Place the pan in the center rack for even heat.
- Preheat your oven completely before cooking
- Use an oven-safe pan that fits your roast
- Position the rack in the center for balanced heating
- Let the pan get hot before adding your seasoned tri tip
Timing Your Oven-Roasted Tri Tip
The cooking time depends on the roast’s size and desired doneness. A two-pound tri tip cooks for 20 to 30 minutes after searing. Remember, timing is a guide; internal temperature is key.
Rotate the pan halfway through cooking for even heat. Avoid flipping the roast too much to prevent drying. When you remove the tri tip, it will continue to cook, raising the internal temperature by 5 degrees.
| Roast Size | Searing Time (450-500°F) | Roasting Time (325-350°F) | Total Time |
|---|---|---|---|
| 1.5 pounds | 10 minutes | 15-20 minutes | 25-30 minutes |
| 2 pounds | 12 minutes | 20-25 minutes | 32-37 minutes |
| 2.5 pounds | 15 minutes | 25-30 minutes | 40-45 minutes |
Learning to cook tri tip in the oven takes patience and attention to detail. Remove the meat when it reaches your desired internal temperature. Let it rest before slicing. This step is crucial for keeping the tri tip juicy and tender.
Mastering the Grill for Perfect Tri Tip
Grilling tri tip perfectly is all about heat control and timing. Use a two-zone setup for searing and gentle cooking. This method works on both gas and charcoal grills, helping you get a beautiful crust and the right doneness inside.
Your grill setup is key to success. You need one hot zone for searing and one cooler zone for finishing. This prevents burning the outside while keeping the inside juicy.
Direct vs Indirect Heat Methods
The direct heat method puts your meat over the flame or coals. This intense heat creates a flavorful crust in about 4-5 minutes per side. You’ll see beautiful char develop on the surface.
After searing, move your tri tip to indirect heat. This zone sits away from the heat source, allowing gentle cooking to your desired temperature without burning the exterior.
For charcoal grills, push coals to one side. For gas grills, turn off one or two burners. This creates your cooler cooking zone.
- Sear over direct heat for 4-5 minutes per side
- Move to indirect heat to finish cooking
- Target 350-400°F in the indirect zone
- Plan total cooking time between 20-30 minutes
Managing Grill Temperature and Flare-Ups
Consistent temperature is essential for grilling tri tip perfectly. On charcoal grills, adjust vents to control airflow and maintain steady heat. On gas grills, use burner adjustments to reach your target temperature range of 350-400°F.
Fat dripping from your tri tip can cause flare-ups. Keep a spray bottle of water nearby to manage flames. Avoid opening the lid constantly, as this drops temperature and extends cooking time. Move your meat to the indirect zone temporarily if flames get too intense.
For extra flavor, add wood chips during the last portion of cooking. Soak chips for 30 minutes, then place them on coals or a smoker box on gas grills. This subtle smoke complements tri tip beautifully without overpowering the meat’s natural taste.
| Grill Type | Heat Control Method | Temperature Target | Flare-Up Prevention |
|---|---|---|---|
| Charcoal | Bank coals to one side; adjust vents for airflow | 350-400°F indirect zone | Keep spray bottle ready; move meat as needed |
| Gas | Turn off one or two burners; adjust remaining burners | 350-400°F indirect zone | Keep spray bottle ready; move meat as needed |
Master these grill techniques, and you’ll consistently achieve restaurant-quality tri tip at home.
The Reverse Sear Method for Maximum Flavor
The reverse sear tri tip method is a game-changer for cooking this cut. It flips the usual order, starting with low heat in the oven or grill’s indirect side. Then, it ends with a quick, intense sear. Many find this method beats traditional ways.
Understanding the science behind reverse sear tri tip reveals its success. Cooking at low temperatures first ensures even doneness. The heat spreads evenly, avoiding the gray band often seen with traditional searing.

- Start your tri tip in a 225-275°F oven or on your grill’s indirect heat zone
- Cook until the internal temperature reaches 10-15 degrees below your target final temperature
- Remove the meat and let it rest briefly
- Sear it hard and fast in a screaming-hot cast-iron skillet or over direct flame
- Achieve a beautiful crust through the Maillard reaction on the dried surface
Timing expectations matter when planning your meal. The low-heat phase takes 45-60 minutes, based on the tri tip’s thickness. Add 2-3 minutes for the final sear. This method may take longer, but it offers consistency and control worth the wait.
Choose reverse sear tri tip for perfect doneness and less food waste. It’s great for cooking for guests who expect top-notch results.
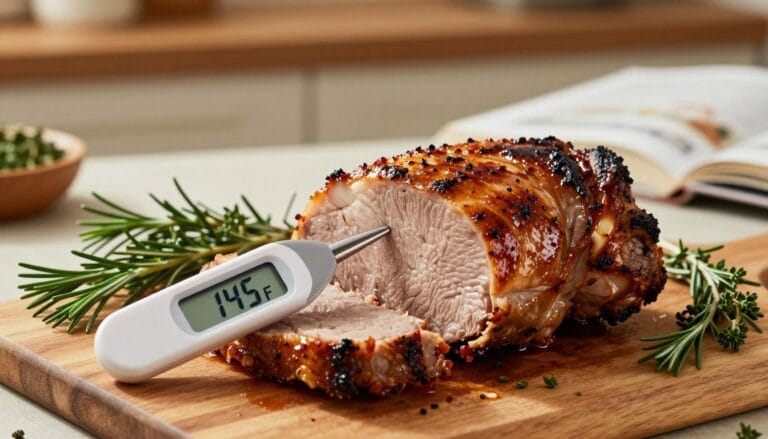
Understanding Tri Tip Internal Temperature
Getting the tri tip internal temperature right is key to a tender, juicy steak. Your meat thermometer is your best kitchen tool for this. Knowing when your tri tip is done ensures great results every time.
The internal temperature tells you when to take your meat off the heat. It’s more reliable than looking or touching. This skill makes you a confident cook, serving top-notch tri tip at home.
Temperature Guidelines for Different Doneness Levels
Each doneness level has a specific temperature range. Knowing these ranges lets you cook to your liking:
- Rare: 120-125°F
- Medium-Rare: 130-135°F
- Medium: 135-145°F
- Medium-Well: 145-155°F
- Well-Done: 155°F and above
Most prefer medium-rare to medium for tri tip. This range keeps the meat tender and flavorful. You get the best texture and taste at these levels.
Here’s a key tip: Remember carryover cooking. Your tri tip’s temperature will rise 5-10 degrees after removal. Pull it at 125-130°F for perfect medium-rare after resting. The thinner end cooks faster, offering different doneness levels for everyone.
Using a Meat Thermometer Correctly
Proper thermometer technique is crucial for accurate readings. Insert the probe into the thickest part of the roast, avoiding fat pockets. Since tri tip is boneless, you don’t need to worry about touching bone, but you still want to hit the meat itself.
Check your tri tip internal temperature in multiple spots. The tapered shape of this cut means different areas cook at different rates. Taking several readings gives you a complete picture of your meat’s doneness.
| Thermometer Type | Best For | Key Advantage |
|---|---|---|
| Instant-Read | Quick checks during cooking | Fast results in 3-5 seconds |
| Leave-In Probe | Monitoring throughout cooking | Continuous temperature tracking |
Instant-read thermometers are great for quick checks. Leave-in probe thermometers let you monitor your tri tip internal temperature from start to finish without opening the oven or grill repeatedly. Both types give you the accuracy you need to nail the perfect doneness level.
Backup your thermometer readings with visual and tactile cues. As you practice cooking tri tip, you’ll learn to recognize the look and feel of different doneness levels. This knowledge builds your confidence for future cooking sessions.
Resting Your Tri Tip After Cooking
Resting your tri tip after cooking is crucial. Many home cooks skip this step and wonder why their meat loses all its juices. When you cook tri tip, heat pushes moisture toward the center of the meat. Resting allows the meat fibers to relax and redistributes that moisture back throughout the cut.
This simple pause makes the difference between dry, tough meat and juicy, tender slices.
Your resting time depends on the size of your tri tip roast. Here’s what you should follow:
- Small tri tip (2-3 pounds): 10 minutes
- Medium tri tip (3-4 pounds): 12-15 minutes
- Large tri tip (4-5 pounds): 15-20 minutes
During resting, place your tri tip on a cutting board with a juice groove or on a wire rack set over a sheet pan. This setup prevents the bottom from steaming, which can soften the crust you worked hard to develop. Tent the meat loosely with aluminum foil to keep it warm. The goal is retaining heat without trapping too much steam.
You’ll know resting is complete when the meat feels warm but not hot to your touch. This waiting period gives you time to prepare side dishes, make pan sauce from drippings, or set your table. Understanding how to cook tri tip includes patience during this phase. Those extra minutes directly improve every bite your family enjoys.
Slicing Tri Tip Against the Grain
The way you slice your tri tip greatly affects its tenderness. Cutting against the grain breaks down muscle fibers, making it more enjoyable to eat. Since the grain direction changes in your tri tip, knowing how to handle this is key.

Identifying the Grain Direction
Examine your cooked tri tip closely. You’ll notice thin lines across its surface, which are muscle fibers. The grain usually runs lengthwise on the larger part. But on the smaller, tapered end, it angles differently.
To slice well, cut your tri tip into two parts at the grain shift point. This lets you slice each part against its grain. This initial cut is crucial for slicing against the grain in both sections.
Proper Knife Techniques for Clean Slices
Use a sharp, eight-inch slicing knife or chef’s knife. Dull knives lead to ragged edges and a bad look. Hold your knife at a twenty-degree bias angle for wider, better-looking slices.
Strive for slices that are about a quarter to half an inch thick. Use smooth, single strokes to cut, not sawing. This keeps the slices even and prevents shredding.
| Slicing Step | Key Detail | Result |
|---|---|---|
| Identify grain direction | Look for visible muscle fiber lines | Know which way to cut |
| Bisect at grain shift point | Separate into two sections | Two manageable pieces |
| Cut perpendicular to grain | Blade at slight bias angle | Tender, clean slices |
| Maintain consistent thickness | Use smooth single strokes | Professional appearance |
Arrange your slices on a platter for a stunning display. Good slicing technique can turn your tri tip into a restaurant-quality dish. This final step is the reward for all your hard work in cooking and resting the meat.
Serving Suggestions and Pairing Ideas
Mastering tri tip cooking methods is just the start. The real fun is in how you present and pair it. Your perfectly cooked tri tip needs sides and accompaniments that bring out its rich flavor. The goal is to balance bold tastes with textures that make each bite unforgettable.
Traditional Santa Maria-style service is a classic choice. It pairs sliced tri tip with pinquito beans, fresh salsa, garlic bread, and grilled veggies. This simple approach lets the tri tip’s natural taste shine.
Main Course Presentations
Your tri tip can be served in many ways. Try it with roasted potatoes, grilled asparagus, and a light sauce for an elegant dinner. Or, stack sliced tri tip on crusty bread with horseradish sauce for a hearty sandwich. Thin slices also work well on fresh salads for a protein-packed lunch.
Complementary Side Dishes
- Garlic mashed potatoes
- Grilled asparagus
- Creamy coleslaw
- Baked beans
- Corn on the cob
- Caesar salad
Sauce and Flavor Pairings
Sauces can elevate your tri tip without overpowering it. Chimichurri adds a fresh, herbaceous touch. Horseradish cream brings a sharp, peppery flavor. Red wine reduction adds deep richness. And, pan drippings make simple au jus that tastes like a restaurant dish.
| Beverage Type | Best Options | Flavor Profile |
|---|---|---|
| Red Wine | Cabernet Sauvignon, Malbec | Bold, robust, earthy |
| Beer | Craft IPA, Porter | Hoppy, complex, smooth |
| Spirits | Bourbon, Rye Whiskey | Warm, spicy, rich |
Making Leftovers Count
Tri tip cooking methods offer more than just one meal. Cold sliced tri tip makes great sandwiches the next day. Chop leftovers for a hearty hash with potatoes and onions. Thin slices also add flavor to grain bowls with veggies and vinaigrette. These creative uses make your meal last longer and keep flavors fresh.
Common Mistakes to Avoid When Cooking Tri Tip
Cooking tri tip at home is exciting, but many face challenges. Knowing the common mistakes helps you cook it like a pro. Avoiding these errors makes your tri tip tender and full of flavor.
Overcooking and Temperature Errors
One big mistake is overcooking tri tip. It becomes dry and tough. Many rely on time instead of a meat thermometer for the right temperature.
Wrong oven temperature is another problem. Too low makes meat gray and steamed. Too high burns the outside and leaves the inside raw.
Carryover cooking is another trap. Your tri tip keeps cooking after you take it out. So, it’s key to pull it at the right temperature.
Don’t cook tri tip straight from the fridge. Cold meat cooks unevenly. Always let it come to room temperature for even results.
Improper Slicing Techniques
Cutting against the grain makes tri tip tender. Cutting with the grain makes it chewy. Knowing the grain direction is important.
A dull knife tears meat instead of slicing it. A sharp knife makes clean cuts. Cutting slices too thick makes them hard to chew.
Slicing too soon loses moisture. Wait 5 to 10 minutes before slicing. This keeps juices in the meat.
| Mistake | Result | Solution |
|---|---|---|
| Overcooking past medium | Dry, tough meat | Use a meat thermometer for accurate tri tip internal temperature |
| Wrong tri tip oven temperature | Gray meat or burnt exterior | Set proper oven temperature based on cooking method |
| Ignoring carryover cooking | Overcooked final result | Pull meat 10 degrees before target temperature |
| Cooking from cold | Uneven cooking | Bring to room temperature first |
| Cutting with the grain | Chewy texture | Identify grain direction and slice against it |
| Using dull knife | Torn, ragged meat | Use sharp knife for clean cuts |
| Slicing too early | Moisture loss | Rest for 5-10 minutes before slicing |
Avoiding these mistakes ensures success with tri tip. Follow temperature guidelines, use the right tools, and let the meat rest. Your dedication to avoiding these errors will make your tri tip a hit with everyone.
Conclusion
You now know how to cook tri tip at home. You’ve learned about choosing quality meat and checking internal temperature. These steps are key to cooking well.
Whether you use the oven, grill, or reverse sear, the basics stay the same. With each try, you’ll get better at cooking tri tip.
Remember, checking the meat’s internal temperature is crucial. Let it rest after cooking to keep the juices in. Always slice against the grain for tender bites. These tips will make your tri tip cooking great.
Cooking tri tip is easy for beginners and fun for experts. It’s perfect for weeknight dinners or special occasions. Try different seasonings and sides to find your favorites.
Tri tip cooking is a gateway to delicious, affordable meals. It offers high-quality beef without the high cost. With time, cooking tri tip will become second nature. You’ll impress your family and friends with your skills.